
|
This article or section is in need of a cleanup It does not meet the wiki's quality standards. You can help the wiki by editing it. |
The phantom town of Folsense is a large, but mostly desolated town in Professor Layton and the Diabolical Box. It is the final stop and true destination of the deluxe carriage of the Molentary Express, while the rest of the carriages go on to Luxenbelle. The majority of the game takes place here. Folsense was rumored to have a vampire living in Herzen Castle. 50 years prior to the arrival of Professor Layton in Folsense, the city was decorated with colourful lights and dazzling features and fountains.
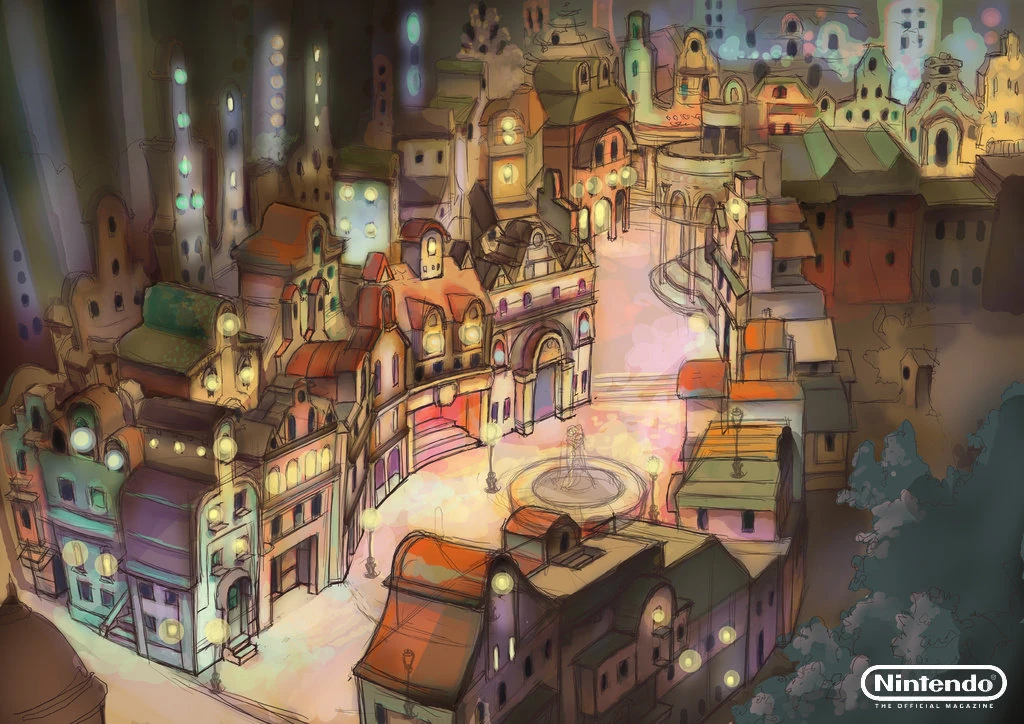

Folsense Artwork
When the train is arriving, Layton and Luke see the real, dark, unlit Folsense over the city wall, but upon entering the hallucinogenic gas affects them. This causes them to also see a brightly lit Folsense, like the rest of the citizens.
Main locations
Most locations in Folsense are explored by Layton and Luke in the game.
Folsense Station

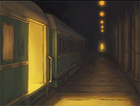
Inside of the Station
At the southern end of Folsense lies its single train station. It is here that Molentary Express makes its final stop. The inside of the dark and creepy station is lined with dusty 50 year-old pictures of Folsense. Atop the shadowy station, there is a clock tower. Rory is usually found just outside the station, in the plaza, waiting for his long lost girlfriend who left Folsense many years ago to return. Upon exiting the station for the first time,

Layton, noticing that something about Folsense is...odd.
Professor Layton, Luke and Flora encounter the brightened and glamorous Folsense similar to how the images depicted the town of fifty years ago. This strikes Professor Layton as peculiar as from the outside of Folsense, the town looked dark and abandoned. Once Folsense has been entered, the Molentary Express is no longer accessible in the game.
The Hotel
Folsense Hotel lies near the southern end, a little north of the station. Early in their investigation, Professor Layton, Luke, and Flora visit the hotel and reserve a room for Flora when she complained about feeling ill. Krantz is the only member of staff left at the hotel as people started fleeing Folsense due to a terrible disaster that struck the town many years ago.
A while later, Barton asks Professor Layton and Luke to come to the hotel to discuss Dr. Schrader's death. After arriving, Professor Layton asks a few people what they see in the torn photograph they finished piecing together. As a result, Professor Layton exposes "Flora" as being Don Paolo in disguise. He also reveals that it was Don Paolo who stole the Elysian Box. Beluga claims ownership of the Elysian Box, but Krantz stops him from taking it. It turns out that Beluga, whose birth name was Fredrich Herzen, was disowned by his father Duke Herzen when he left Folsense some 50 years ago.
Herzen Museum
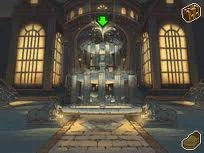

Outside the museum
The Herzen Museum is located at the center of Folsense. After a while, Professor Layton and Luke gain access to the museum with help from Sammy, who thanked Professor Layton for proving his innocence in the case of who killed Dr. Schrader.
Inside, Professor Layton and Luke are welcomed by Grinko, the curator of the museum. While looking through the first floor, Grinko explains to them some of the town's rich and unsavory history. The old gold mine on the far west side, built by the late Duke Herzen, brought the town its wealth and glory. However, Grinko suspects that there is another secret hidden in the mine.
On the museum's second floor, Professor Layton and Luke first learn about Anton Herzen from an old family portrait. Professor Layton wonders what happened to Anton, as the townsfolk believed in the story of a vampire residing in Herzen Castle. Nevertheless, he and Luke set up for the abandoned gold mine.
The Gold Mine
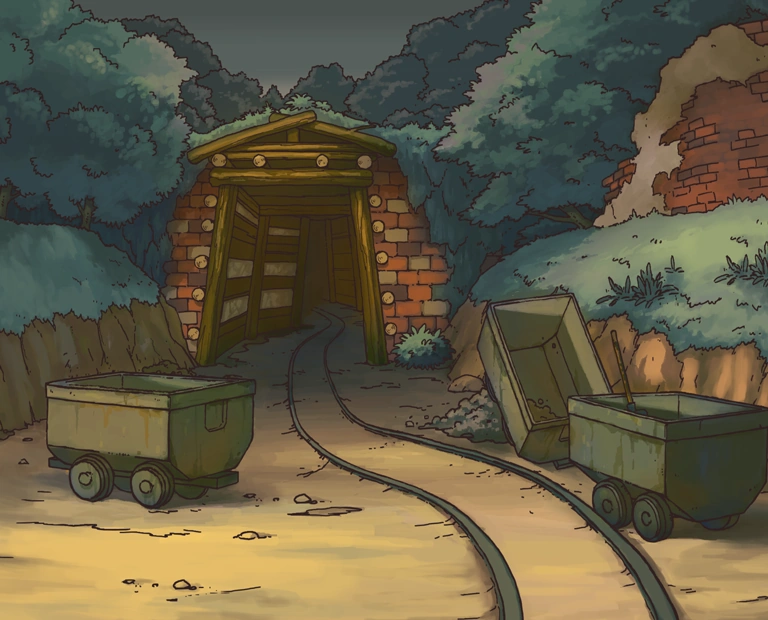

The Mine entrance.
The gold mine is located on the far west side of Folsense. Inside, many machines and devices are found. Each machine had its own purpose for the mine's production. It can be easily inferred that no one has used this mine in a very long time as some of the switches and buttons are borderline inactive. At the end of the long path through the mine, a single large safe is found, covered in dust and locked. After Professor Layton cracks the code, the safe opens, revealing a single diary owned by one of the miners. This diary notes some of the most important events in the history of Folsense. The workers apparently found a new ore whilst mining, and soon afterwards, people began falling ill and died. After reading the diary, Professor Layton and Luke leave the mine, and decide that it is time to visit Herzen Castle.
Herzen Castle
Herzen Castle is located on the far north side of Folsense, past the shadowy forest on the north end of town. It is said that a vampire lives in the castle, but Professor Layton isn't convinced.
Upon reaching the castle, they find Parcelle running away, having supposedly been attacked by the vampire. He quickly runs off into town to warn the others. At the castle, Professor Layton and Luke are greeted by Nigel, the butler. Nigel asks them why they are here, to which Layton simply answers that he wishes to know more about the secrets of the Elysian Box. Nigel allows them to proceed and guides them to the room Anton is residing in at the time. Anton greets them and takes them to the dining room where they talk about the box. Soon afterward, they are asked by Anton to stay the night.
After noticing something odd in the guest room, Professor Layton and Luke are knocked unconscious. When they wake up, they find themselves tied up in a storage room in the bowls of the castle. Professor Layton quickly uses his wits and escapes Anton's trap. Professor Layton and Luke investigate the deep levels of Herzen Castle in search of some clues. They find a large gaping hole in the lowest room that seems to be a pathway into the mine. Knowing this, the two proceed into the ground level of the castle. After this, they then proceed to the doors, but the Professor decides to stay inside the castle, knowing that the answer to Doctor Shrader's death lies within the castle.
Other locations
Outside the Hotel
Outside of the hotel on the southern side of Folsense, many bright buildings line up, creating a puzzle for someone searching for a night to stay. Opal can be found here in the later portions of the game. Sammy also rocks on in this area.
Promenade
The promenade is a small area in southern Folsense which is where the antique shop is. Layton and Luke find Katia being interrogated by Inspector Chelmey here at one point in the game. Joanie is usually found in this area as well. Upon an earlier leap of their trek through Folsense, Layton finds an old diary.
Antique Shop
The antique shop of Folsense is entered via the promenade and is run by Dawson. He takes in all sorts of items with a colorful histories at this place of antiquities. Here, Layton and Luke try and gather some more information about Folsense's dark past.
Clock Tower Plaza
The largest plaza in Folsense, the clock tower plaza has a small tower on the right side. This plaza is where many residents of Folsense go to get around the town. Both Niles and Derby are in this area and, at one point, Stachenscarfen makes an appearance.
Cabaret
The cabaret, run by Ilyana is found on the southwest side of Folsense. This building's insides aren't accessible, but the outside is. This is one of the many paths leading to the west side of Folsense.
Granny R.'s
Granny Riddleton has another one of her shacks located in Folsense. However, unlike the first two in the game, this one remains here for the remainder of the game. Located on the far west side of Folsense, Granny Riddleton set up a new home for her puzzle keeping.
West Y-Road
The west Y-road, north of the cabaret, is another one of the many roads in Folsense. Both Lila and Narice are found on this road. It splits off into two separate paths. One of these paths leads further west, and the other goes to the Herzen Museum.
Museum Gate
In central Folsense, one building stands tall, the Herzen Museum. This museum has only one entrance, through a gate at its southern end. This gate is where Duke hangs out and is locked most of the day.
Northeast Path
The northeast path is a small area, located in eastern Folsense. The path to the north here, is primarily guarded by Precious, an angry guard dog. The path down leads into a tall staircase leading down to the pristine Folsense restaurant.
Eastern Side Street
In eastern Folsense, there is a street that leads up a giant staircase into the upper levels of the town. This staircase is found on the eastern side street. This street is also where both the Folsense restaurant and the photo studio are.
Photo Studio
Inside the photo studio, Layton and Luke discover more of Folsense's dark history. A man by the name of Joseph runs the shop and knows much about the town.
Northeast Alley / Alley Entrance
To the northeast of the photo studio, there is a lone street that takes a while to traverse. It goes to the northern most area of Folsense as well. Along this road, one of Folsense's best bakers, Gertie is found, usually giving samples of her award-winning pancakes.
Flooded Street
Along the northeast alley, there is a Y-road that is completely flooded. Here, this alleyway separates into a garbage heap and a dead end.
Garbage Heap
One of the two areas the flooded street will take the player is this garbage heap. The name says is all, this is a huge pile of rotten garbage found in a dead end between many different buildings.
Seedy Alley
The other path the flooded street will lead to is the seedy alley. This plant-filled alleyway is found in the northeast section of Folsense. Here, Layton and Luke find some abandoned and collapsing buildings.
Alley Dead End
Around the end of the long northeast alleyways, there is a lonesome dead end, that Dogey usually hangs around at. This dead end also houses a single occupied home.
Alley End Room
The building at the dead end of the northeast section of Folsense, isn't much to talk about. It's ominous and filled with old crafts. This building is empty for the most part.
Western Path
The western path of Folsense, as the name suggests, is a central path in western Folsense. It is on this road, both the watchtower and grocery store can be found. Olson and Marina are found in the vicinity as well.
Grocery Store
At the western path of Folsense, Garland's grocery store is found. Inside, there are many cloves of garlic to ward off any vampires in the area. Unfortunately, the smell keeps customers away as well.
Watchtower 1st Floor
The first floor of the watchtower in western Folsense. There isn't much to say other than it seems abandoned, what with all the trash and storage inside. There is also a lot of garlic hanging from the ceiling.
Watchtower 2nd Floor
This is where Geoff watches for the vampire that apparently lurks in Herzen Castle to the north. From the view of the watchtower, one can see Folsense in its beauty as well as the ominous and looming Herzen Castle.
Northern Folsense
The northernmost area of Folsense. Layton and Luke go here once and encounter Parcelle, who is delivering letters all over the city.
Broken Gate
The sole entrance to the dark forest to the north. This gate also serves as a gate to the old abandoned mine located in northwest Folsense.
Fork in the Road
This fork in the road is the first area of the shadowy and creepy forest that is located in northern Folsense. There are two paths to take from here. The path to go left, which takes you to the old mine and the path to go right, which lands the player deeper within the dark forest.
Forest Gate
The gate into the forest. A carriage goes through every day to deliver supplies to Anton in Herzen Castle.
Dark Forest 1
The first area of the dark forest. There are statues that line the pitch black pathway. On the ground, there is a lamp.
Dark Forest 2
The second area of the dark forest. This sector is made up very similar to the first and has many glowing mushrooms inhabiting it. Another lamp is near here as well.
Dark Forest 3
The third and final area of the dark forest. A frozen lake fills the ground and creates quite a puzzling gateway for the professor and his young apprentice. Here, Layton and Luke somehow slide across the ice in order to make way to the end of the forest.
Dark Forest Exit
At the end of the dark forest, a deadly mist arises. This is indeed the end of the dark forest and marks the northernmost tip of Folsense. Herzen Castle can be seen.
Plot

Chapter 3: A Diverging Path
Layton, Luke, and Flora got back on the Molentary Express after visiting Dropstone, thinking that they were heading to Luxenbelle. They then went to the deluxe car, which was now open. They started heading through a tunnel, when the express switched the deluxe car to a different train, but they slept through it, thanks to Sammy's roses. Once they woke up, Sammy announced that the next stop was Folsense. Luke then wonders why everything outside was dark, even though they were out of the tunnel. They then pull up into Folsense Station, which they get off the train at.
They then walk through the station corrodor, which was filled with pictures of Folsense. Once they make it to the area leading outside, they start getting dizzy. Once this stops, they walk outside the station seeing the dark, abandoned town, turn into a gleaming, lit up town. The utter dizziness then strikes back, when the station was changing as well. Layton then starts thinking, what was going on there?
Chapter 4: The Phantom Town of Folsense
Layton, Luke, and Flora go out to explore Folsense. After a quick conversation with Parcelle, Flora's face goes white, and she tells the professor she doesn't feel well. Layton takes this as a first priority, so he and Luke try to seek out Folsense's hotel in order for her to rest.
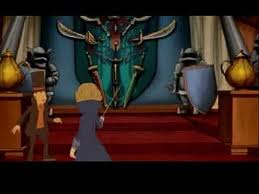
While Flora rests, Layton and Luke go to investigate the rest of the town. Right after they leave the hotel, they investigate the antique shop. Outside they can see Inspector Chelmey interrogating Katia, who leaves right afterward. They then head to the Herzen Museum, but it was closed unfortunately. Soon after, they go to the watchtower, where Geoff tells them that there was a vampire living in Herzen Castle. Once they make it to the museum, the gate was opened, and they hear a conversation between Sammy and Beluga, and they see a goat symbol, and Layton says that he has to talk with the inspector about the torn photo.
Once they make it back to the hotel, they ask Chelmey if they could have the torn photo, but when Chelmey tries to pull it out of his pocket, there was a hole in his pocket, so now Layton and Luke have to search for the pieces.
Chapter 5: Shadows on the Street Corner
After their discussion with Inspector Chelmey, Layton and Luke head to the northeast area of Folsense, where they search for the photo pieces. Unfortunately they only find 7 pieces there, which makes them search through the whole town now to find the rest. They find every single piece, except for 1. They head to the station later, where Rory tells them that the final piece was on the broken gate at the edge of the town. After they get that piece, they put them all together, which made an image of the Elysian Box. Soon after they put them together, a piece got blown away, forcing them to glue the remaining pieces together. Soon after that, Barton comes with a message from Inspector Chelmey. Barton told them the inspector wanted them at the hotel, because he thought he knew who murdered Dr. Schrader. So Layton and Luke then head back to the hotel.
Chapter 6: The Road to Herzen Castle
Layton and Luke then return to the hotel under the inspector's orders. There, they see Flora, Katia, Mr. Beluga, and Sammy. Chelmey then states that one person in the lobby murdered Dr. Schrader. He also stated that the town and the Elysian Box were connected, and that the murderer had to use the Molentary Express to go from Folsense to London. He then says that he thinks Sammy was the murderer, which shocks everyone. Layton then talks to Flora, who says that she was shocked that Sammy did it, Layton then shows her a picture of the Elysian Box, which she said the emblem looked like a cute goat. But because a piece was missing, which made the emblem look like a frog.
Layton then reveals that Sammy was not the murderer, and that Flora was. Then, Flora revealed herself to be Don Paolo, who ran away with Chelmey and Barton chasing him. But oddly, he said that the doctor was lying on the ground when he took the box. While running away, Don Paolo dropped the box, which Krantz picks up. Beluga then asks for the box, but Layton and Luke get it from him.
While Layton and Luke head back to their room, Katia comes up and asks them for the box, but Rory comes and tells everyone that somebody had been take to Herzen Castle, Katia then leaves, Layton and Luke then go to their hotel room. Once they get there, they open the box, but surprisingly, it was empty, which was just what Layton thought.
Soon after they opened the box, Sammy tells them that he opened the Herzen Museum for them. Layton then decides to go to the Herzen Museum, which they then do.
Once they make it there, Grinko, the museum's curator, welcomed them and allowed them to look around. After checking out the first floor, they go on up to the museums second floor. Up there they find a portrait of Duke Herzen, and a picture of him with Anton and Mr Beluga, who was actually one of the Duke's sons. They then head back to the first floor, where Grinko asks them if they were looking into the history of the Elysian Box and of the town itself. Since they answered that they were, he tells them to go down into the mine.
They then make it to the area near the forest, which was a fork in the road, the left side led down to the mine, while the one on the right led into the forest. They then go to the one leading to the mine. Once they make it to the mine, they head inside it, which led to a safe. Once they open it, they find a journal that stated that they dug down and found gold, but unknowingly hit something else, which caused people to die, and the remaining people to leave Folsense. Layton then states the funny thing was that the journal was dated 50 years ago, while they were told the mine was running until recently. They then leave the mine.
Once they make it out of the mine area, Joseph comes and tells them that he spied on them. He also tells them that the town was cursed, and that the answers were all at Herzen Castle. Layton then tells Luke that they have to head to the castle, because even though the duke was dead, his castle should have secrets of the towns past still there. They then head to the dark forest.
After going through the mysterious forest, they get to Herzen Castle, which had a huge crater around it. They cross the rickity bridge, which was surprisingly not remade. Once they make it across, they head inside the castle.
Chapter 7: An Encounter at the End of the Line
Once they make it to the castle, Nigel welomed them and took them to the dining room where Layton and Luke meet Anton Herzen, who invites them to stay the night. Once they make it to their room, they find an image of Folsense, which was taken 50 years ago, but it looked like the present-day Folsense. They also notice a painting of Anton and Sophia dancing at a ball. Layton decides that they should sleep soon after finding the picture and the painting. While they were sleeping they dreamed of being at a ball, where they see Anton and Sophia dancing. Sophia notices them and is scared by their presence. Anton notices and says that they were just the dinner for the night. The other dancers' eyes went red, and they started cackling.
When Layton and Luke woke up, they found themselves tied up in a spare room by Anton, who soon left them in there. They soon escaped the ropes and the room, only to find themselves trapped in the castle's underground area. They then go to the boiler room, which had a huge hole in the middle, which Layton thinks that is part of the town's biggest secret. They soon make it back into the castle's great room, where Layton says that they should stay to investigate the castle some more. So they then start investigating some more, when they make it to the balcony in the great room they see Katia once again.

Layton choosing one of the swords.
While trying to escape, they meet up with Katia in the great room. She tells them that they have to get out now and she guides them to the exit, however Anton catches them trying to escape. Anton sees Katia and believes that she is his lost love, Sophia. He asks her to be by his side again, but Katia runs behind Layton in fear. Anton then begins to think that Layton is the reason for Sophia's leave many years ago. He thrusts at Layton, but Layton and Katia dodge the attack. He then tells Layton that he can grab one of the swords on the wall to defend himself. The

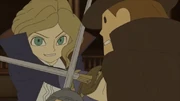
The duel between Anton and Layton.
two begin their duel and the two begin thrusting their blades at each other swiftly and relentlessly. During the fight, they both end up at the top level of the castle and Anton begins to tire. He gets on his knees and begins hyperventilating. Katia and Layton comfort him, and tell him what is really going on here. After hearing what has happened to Sophia, he flies into a depressing rage, destroying some fine pottery as well as a chain holding up the chandelier. Upon breaking this chain, the chandelier falls onto the ground of Herzen Castle, causing the unsturdy, ancient building to collapse. Anton, Katia, Layton, and Luke begin to sprint out of the castle in order to escape. Upon their leave, they notice Folsense for what it really is, a ruinous town filled with abandoned buildings and torn streets.
It is revealed that the bright and glamorous Folsense, and its residents, is actually an illusion caused by hallucinogenic gas emitted by the massive hole beneath Herzen Castle. The photos in the station were used in Layton, Luke and Flora's subconscious mind, along with the gas, to form the illusion of the Folsense travelers would see, the Folsense of fifty years ago. In reality, Folsense is very run-down and is completely deserted apart from Anton and Nigel. Sophia left Anton and Folsense in order to keep her unborn baby safe form the horrors of what has happened to Folsense. Anton made the Elysian Box as a gift for her, but the box almost never made it to her. It was stolen again and again due to its incredible value, however due to this constant stealing and trading of ownership, terrible things began to occur. Due to the hallucinogenic gas having traces within the ore used to carve the box, all who got near the box, were succumbed to the gas. All who got close or opened the box expected death, and in doing so, fulfilled their own grim predictions. They then leave on the Express, heading back to London.
In the credits, it is shown that Anton and Katia are repopulating Folsense with people from Dropstone.
Spoilers end here
Images
")
")
")
")
")
")
")
")
Media
Folsense |
Length: 3m12s |
Folsense (Live) |
Length: 5m24s |
The True Folsense |
Length: 0m37s |
Trivia
- The name "Folsense" means "false sense." The name alludes to the town being a false reality to its true appearance.